There are two ways to use the Calibration Target: you can open it on the screen and take a shot (with a digital or film camera, depending on your workflow) or you can print it out and then shoot or scan the hardcopy.
Shooting the Calibration Target off the screen is faster, especially with a digital camera. However, be careful when shooting it off the screen of a CRT monitor because you may occasionally capture scan bands. These bands may spoil a part of the Target image. If you cannot avoid these bands, prepare a printed version of the Calibration Target or shot it off an LCD monitor, which does not produce this effect.

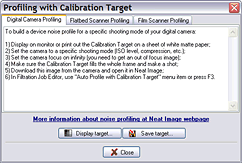
 (the Calibration Target button) or select the Tools | Calibration Target… menu item; the Profiling with Calibration Target popup window (see on the right) will open;
 (the Display target… button) in the popup window;
 (the Calibration Target button) or select the Tools | Calibration Target… menu item; the popup window will open;
 (the Save target… button) and select a name for a *.BMP file to save the image of the Calibration Target to;