
1. Open an input image
- the image viewer will display the input image;
- the information panel will display relevant image data;
The Filtration Job Editor is used to filter one image. The Filtration Job Editor window usually opens when you create a new filtration job. When you start Neat Image for the very first time, the Filtration Job Editor window opens automatically.
Using the Filtration Job Editor you can:
| |
1. Open an input image - the image viewer will display the input image; - the information panel will display relevant image data; |
 |  |
2. Prepare a device noise profile - noise analysis necessary to filter the image - you can open
a ready-made profile - to build a new profile click the Auto Profile button; |
 |  |
3. Adjust the noise filter and sharpening settings to achieve desired level of noise reduction and sharpening - click the Preview button and Neat Image will automatically select an image area and prepare a preview; - adjust the filter settings: - as soon as you are happy with the preview proceed to the next stage; |
 | 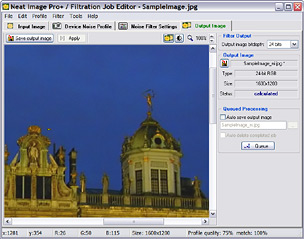 |
4. Process the input image - apply filter to the whole image; - when processing is finished, evaluate the resulting output image by comparing it with the input image; - save the output image to a file on the disk. |